Home » Google Keyword Planner Tutorial
Google Keyword Planner is a vital tool for paid search marketers but also marketers from other disciplines such as SEO professionals, and content creators.
Designed primarily to help in selecting keywords for Google Ads campaigns. It excels in both discovering new keywords and providing data on existing ones, allowing users to input terms, phrases, or a website’s URL for related keyword suggestions.
The tool offers invaluable insights into historical search volumes and patterns, including geographical data, which is crucial for both SEO and geo-targeted advertising strategies. It also provides an understanding of keyword competition levels, aiding in strategizing SEO or PPC campaigns effectively.
For Google Ads advertisers, Google Keyword Planner estimates the bids for each keyword, assisting in budgeting and campaign planning.
Accessible through a Google Ads account, it’s a must-have for business owners and entrepreneurs to gauge market demand and tailor their online presence. Regular use of the tool ensures keeping up with changing search trends and optimizing digital strategies. Combining its data with other SEO and analytics tools can provide a more comprehensive view, maximizing its utility. In this tutorial, we run through the basics of keyword planner and how you can leverage it for your business.
Keyword planner is only available if you have a Google Ads account. Visit this tutorial to learn how to create a Google Ads account.
Once you login, visit tools –> Keyword Planner (11.12.2023, it’s on the left hand side).

You are presented with two options. To run keyword research, hit “Discover new keywords”
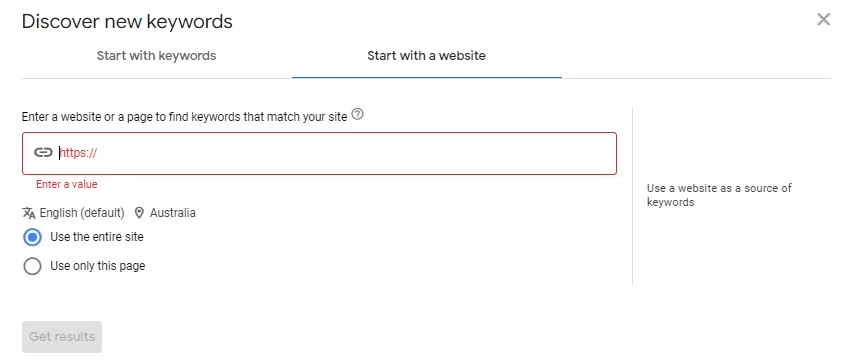
Start with a website
“Start with a website” is the simplest approach; you can input your competitor’s website. You have the flexibility to either utilize the entire site or select just one of its pages.
Using the entire site can yield a broad range of results, whereas focusing on a single page allows you to more precisely target the specific keywords you wish to uncover.

Tip: Competitor research is a great starting point but you are never going to dominate the market if you simply copy their strategy. It’s best to use this option to get some ideas on keywords.
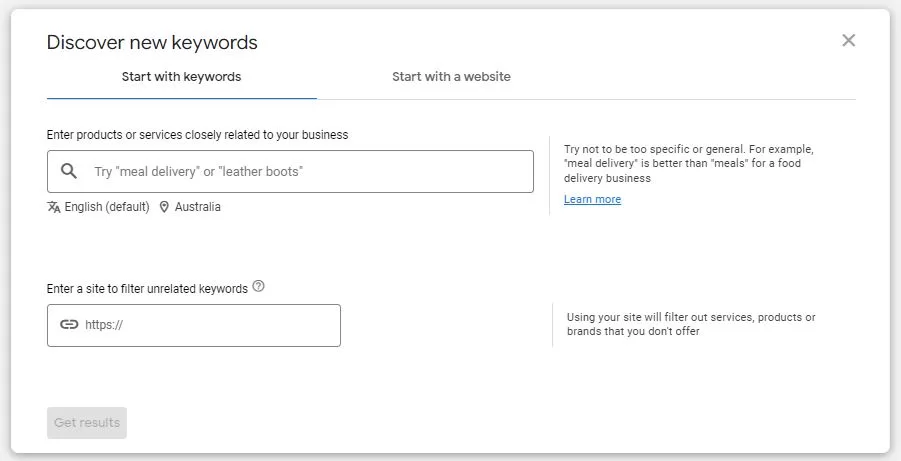
You can input multiple keywords into the search bar. Start with broad category keywords to get some ideas. Take for example CRM. You would start with that term to get a list of initial keywords. Pick the ones that are relevant and add them to the search bar. Hit enter after each keyword to enter your next keyword. You can also use the site filter to block out keywords you don’t offer.

Tip: You can sometimes get new ideas by playing around with the location settings. The US is always a good playground for uncover upcoming keywords that may not have kicked off in your own country.

We will use “CRM” as an example and break out the sections into 4 main parts.
1. This section allows you to add additional keywords into the search bar, you can also change location, language and date settings (relevant if your keywords are impacted by seasonal changes). The Google option lets you choose forecasts for Google Search only or include estimates from search partners as well.
2. The section gives you additional ideas for new keywords. You can quickly find new keywords this way.
3. This section is where all the important information is contained. Here is how you interpret the data from the default columns.
Avg. Monthly Searches: Helps you forecast volume of total available impressions. Note high volume may not always be the metric to go after.
3 month-change – Helps you plan for seasonal / Quarter on Quarter (QoQ) changes.
YoY change – Helps you pick up rising trends year on year.
Competition – Shows how many advertisers are also bidding on the same keyword. Low competition is ideal but it could also mean that there is no business value to go after these keywords.
Bid Ranges – Shows you the amount you can be expected to pay to reach the top of the page.
4. You can use this section to filter your keywords in greater detail. For example, you may want to exclude all “Brand” keywords if you don’t have a competitor strategy.
Once you have completed your keyword research, you can upload the list onto the “Get search volume and forecasts” to get an estimate on how your campaigns will perform. This creates a plan which you can also download. This section is particularly important if you plan to run lead generation.
In the plan, the “Saved Keywords” tab returns the same keyword data. Navigate to “Forecast” to see expected performance.

Look for positive and negative keywords: It’s important not just to search for new keywords to target, but also to identify keywords to exclude, ensuring you don’t expend marketing resources on irrelevant terms.
Create campaign: You can create a campaign directly within the planner. However, it’s probably best to build the campaign separately using Google Ads editor or the native interface.
Bid Strategy Forecasts: You can get multiple forecasts by playing around with the bid strategy selection in the forecast section.
In conclusion, Google Ads Keyword Planner is a very powerful tool for keyword research and Google Ads planning. There are other digital marketing tools which could also compliment Keyword Planner, including Google’s own Trends and paid tools. In our opinion, The keyword planner is sufficient for most of your keyword research but a multifaceted approach enables marketers and entrepreneurs to not only target relevant keywords but also stay ahead of market dynamics and consumer interests.
I dive into advanced keyword research techniques and help you set up for success in my comprehensive Google Ads lead generation course. Learn more by clicking the link.